Wednesday, September 24, 2014

Synology, StartSSL, OpenVPN and Tunnelblick

As I mentioned previously, I had switched my Synology box to have a real, live SSL cert from a trusted CA, StartSSL. That worked great for connecting via SSL to either the web console, or Chrome extension for Download Station. All worked swimmingly, until I discovered my OpenVPN connection wasn't functioning any longer. PPTP worked fine, but OpenVPN had issues. Turns out the Synology box, the OpenVPN server, and therefore, the OpenVPN client connection package, don't understand the StartSSL CA. Here was my process of discovery and resolution for this issue.


I tried re-exporting the config, changing the hostname to the new Internet-facing hostname. That didn't work. I re-exported the .crt files from the server and included them in the .tblk file to import into TunnelBlick. That didn't work.

Then I decided to go look at the client connection logs, which is where I should have started. Here's what they said:
2014-09-24 09:50:43 *Tunnelblick: openvpnstart starting OpenVPN
2014-09-24 09:50:44 VERIFY ERROR: depth=1, error=unable to get local issuer certificate: /C=IL/O=StartCom_Ltd./OU=Secure_Digital_Certificate_Signing/CN=StartCom_Class_1_Primary_Intermediate_Server_CA
2014-09-24 09:50:44 TLS_ERROR: BIO read tls_read_plaintext error: error:14090086:SSL routines:SSL3_GET_SERVER_CERTIFICATE:certificate verify failed
2014-09-24 09:50:44 TLS Error: TLS object > incoming plaintext read error
2014-09-24 09:50:44 TLS Error: TLS handshake failed

Researching this error, I found the following reference on the Synology forums:


Here's how I fixed this problem:
  1. Get the StartSSL root CA cert (ca.pem) and the StartSSL Class1 cert (sub.class1.server.ca.pem) from StartSSL's web site
  2. Concatenate the StartSSL root CA with the StartSSL Class1 cert and save it as a new file. You can use cat in *nix to do this or notepad in Windows, or TextEdit in OS X. Order doesn't matter. It will look something like this, except much longer:

-----BEGIN CERTIFICATE-----MIIHyTCCBbGgAwIBAgIBATANBgkqhkiG9w0BAQUFADB9MQswCQYDVQQGEwJJTDEW
NOsF/5oirpt9P/FlUQqmMGqz9IgcgA38corog14=

-----END CERTIFICATE-----
-----BEGIN CERTIFICATE-----
MIIGNDCCBBygAwIBAgIBGDANBgkqhkiG9w0BAQUFADB9MQswCQYDVQQGEwJJTDEW
Q2VydGlmaWNhdGUgU2lnbmluZzEpMCcGA1

-----END CERTIFICATE-----

On your Synology box, do the following: 


  1. In Control Panel > Security > Certificate, you may see that your StartSSL cert is already installed, which was the case in my situation. If this is true, export your certificates, so you have a known good copy of your server.crt and server.key. This will be needed on the next step.
  2. Import your server.key, server.crt and the new ca.crt (or whatever you called it) file generated above as the intermediate certificate.
  3. This took a bit to import and restart the web server. 
  4. Go into Package Center and find VPN Server. "Stop", then "Run" the VPN server.
  5. Re-export the OpenVPN config and fix your client .tblk package for the clients.
After this, I was able to successfully connect using OpenVPN to my Synology box again. Woo hoo!

Thursday, August 21, 2014

Implementing a free StartSSL cert for Synology NAS

I have a plugin for Chrome called Download Station Extension (http://www.download-station-extension.com/, also available for Safari and Opera) which allows me to tell my Synology NAS to download and initiate torrent downloads among other things. It is excessively handy.This extension supports all types of downloads that are supported by Synology's Download Station, application developed by and built into the Synology base OS. (http://www.synology.com/en-global/dsm/home_multimedia_download_station) . You can tell your Synology box to go download files quickly and easily, including: 
  • BitTorrent (both .torrent files and magnet links) 
  • Usenet news NZB files 
  • http, https, ftp, sftp and ftps downloads 
  • YouTube videos 
  • Some supported filehosting websites 
The extension does this by logging into the "Download Station" app on your Synology using your. This is great, however, there is one significant caveat. The Download Station Extension will only use http until you have a trusted SSL cert installed. In order to protect the credentials to your Synology and use SSL/https, this plugin needs a certificate that is trusted by your browser. And in order to do that, you need to install an SSL certificate on your Synology NAS that comes from a real Certificate Authority (CA).

Now, to be clear, your Synology does have a SSL certificate already, but it's a "self-signed" certificate, meaning your server generated the certificate and it also validated it as being a good, trusted certificate. 

A post in the Synology Community Site describes how to go the process of installing a free StartSSL cert, however it involved significant ssh command line work, operating with openssl directly. Turns out Steps 1-6 in this guide are no longer necessary. You could probably still do the requisite work through ssh/openssl, however, according to the Synology guide here, you no longer have to ssh into the box to generate a certificate signing request or process the certificate returned from an SSL cert provider. 

Based on that, here's what you need to do.
  1. Go to the Synology guide, and perform steps 1-7. Proceed to the next step.
  2. Use the Synology Community Site post by GNOE Inc. and perform steps 7-8.8 to generate the StartSSL-based (free) cert.
  3. Go back to the Synology guide, and perform the last steps on the page, 1-3.

Make sure that the SSL certificate domain matches the domain you're using to access your NAS through the Internet. If the SSL cert and the domain don't match, you'll still get SSL cert errors and you won't get the benefits of this whole process.

Hope this guide helps!

Chris

Saturday, March 1, 2014

Moving a Windows 7 VM from Parallels 8 to VirtualBox 4.3 on OS X Mavericks using VMWare Fusion

My first Macbook Pro was a 1st Intel generation, early 2006 model, that I bought from someone local on Craigslist in 2009. (Example to the right.) I cut my teeth there and got used to the Mac-isms and the Apple-isms about running OSX. That machine was't going to run any virtual machines well, so I never installed VirtualBox, Parallels or VMWare Fusion.  That machine wouldn't install anything newer than 32-bit Snow Leopard. No Lion and no Mountain Lion. This was frustrating enough, and then software application makers moved to 64-bit entirely, so then I wasn't able to run the software either.
So, in early 2013, I bought a new Macbook Pro and now I had the horsepower to run VMs. Woo hoo!

Parallels pushes their marketing heavy on the Mac world. They have a lot of features, and seemed to have a lot of people who have used the product successfully. So I bought it too.

Fast forward to late 2013, and the release of Mavericks. Before I installed Mavericks, Parallels started warning me about Parallels 8 compatibility with Mavericks. I scoffed. All of the reviews said it ran just fine, and it has, but I have become increasingly resentful of having to shell out $50 for an upgrade, for little benefit. 

So, I decided to try to convert my Win7 VM in Parallels to a Win7 VM in VirtualBox. I ran into a few issues. Here's how I did it successfully (I'll list what didn't work, after):

Step 1) Shutdown the Parallels VM, not just sleep, actually shut the machine down.


Step 2) Convert Parallels machine (.pvm) to VMWare (.vmwarevm) virtual machine

To do this, you'll need to first, download and install the VMWare Fusion trial through the normal means. Here's a YouTube walkthrough:


Next, once you get it installed, choose to "Import" an existing machine. This will make VMWare Fusion go look for existing virtual machines on the system. Of course, in this case, my Windows 7 Parallels instance exists, so it found it right away. (Not sure why it listed it as a "Recent Item", though.)


Click on Continue. You'll be asked what you want to call this new VM. It will use the same base name, but then provide the VMWare extension .vmwarevm for the new virtual machine. You don't really need the whole machine, I don't believe, but the process does create the .vmdk disk image inside the directory named YourNameHere.vmwarevm which we will need in the next step.


Of course, click save.

At this point, I fired up the Windows 7 virtual machine under VMWare Fusion and everything went swimmingly. I just wanted to make sure the new disk image was viable. Because of that, and because I didn't want to create any other issues I didn't install the VMWare extensions. I simply shut the machine back down again and moved on to Step 3.

Step 3) Convert a VMWare disk image (.vmdk) file to a .vdi file which VirtualBox understands

First, install Oracle VirtualBox. You can get it from here: https://www.virtualbox.org/wiki/Downloads

Second, we'll convert the VMWare Fusion disk image in .vmdk format to VirtualBox-import-capable .vdi disk image using a VirtualBox utility called VBoxManage.

You'll need to run this command either from the directory that the .vmdk file is in, or you'll have to put in the full path to the .vmdk file. Mine was ~/Documents/Virtual Machines.localized/Windows 7.vmwarevm

  VBoxManage clonehd --format VDI Windows\ 7-0.vmdk newimage.vdi

I then moved the .vdi image to my VirtualBox VMs directory.

    mv newimage.vdi ~/VirtualBox\ VMs/

Third, start up VirtualBox and set up a new VM and choose an existing disk image.

Here's the "New" screen:


And this is the area where you'll choose "Use an existing virtual hard drive file". You'll have to then find the .vdi file and it will end up populating the area below the radio button.


Click on Create.

That's it. Fire up the new VirtualBox VM and install the extensions.

Once you're satisfied with the fact that it booted and you're running Windows in VirtualBox on Mavericks on your Mac...you'll have to remove your Parallels instance. Windows will start barking that it is counterfeit. You'll have to reactivate your license on this VM.

Thursday, February 6, 2014

How to Install Metasploit on Mavericks 10.9.1 (in 2014)

I've been struggling with getting Metasploit installed in my Mavericks (10.9.1) based MacBook Pro. The instructions I found weren't lining up with my experience, so I thought I'd write up my experience and how I was able to get it installed.

My instructions are from my experience, but I got a lot of help from resources such as DarkOperator's instructions here:

http://www.darkoperator.com/installing-metasploit-framewor/

He developed a script to a bunch of this work for you, however, I haven't tried it. I noticed that it is using an older version of ruby in the 1.9.3 tree.
https://github.com/darkoperator/MSF-Installer/blob/master/msf_install.sh

1. Install Xcode on Mavericks 10.9.1

Go to https://developer.apple.com/xcode/ to download and install. Move to Step #2, unless you want to read through my experience.

Other sites will tell you to install the command line tools by using the command line (don't do this yet):

xcode-select --install

When you do this, it looks promising:


But it will eventually fail with the following message:

"Can't install the software because it is not currently available from the Software Update server."

Other sites will also tell you that you need to check the "Command Line Tools" box in the XCode Preferences/Downloads tab. Notice it doesn't exist in XCode 5.


Turns out, you don't need to install the command line tools, as they're included with XCode 5 (reading comments from this thread: http://www.computersnyou.com/2025/2013/06/install-command-line-tools-in-osx-10-9-mavericks-how-to/) . Verify they're installed by checking for gcc and g++.


CGMbPR:~ cgrant$ gcc -v
Configured with: --prefix=/Applications/Xcode.app/Contents/Developer/usr --with-gxx-include-dir=/usr/include/c++/4.2.1
Apple LLVM version 5.0 (clang-500.2.79) (based on LLVM 3.3svn)
Target: x86_64-apple-darwin13.0.0
Thread model: posix
CGMbPR:~ cgrant$ g++ -v
Configured with: --prefix=/Applications/Xcode.app/Contents/Developer/usr --with-gxx-include-dir=/usr/include/c++/4.2.1
Apple LLVM version 5.0 (clang-500.2.79) (based on LLVM 3.3svn)
Target: x86_64-apple-darwin13.0.0


Thread model: posix

2. Install homebrew.

The install URL for homebrew has been updated, so use this on the command line:


ruby -e "$(curl -fsSL https://raw.github.com/Homebrew/homebrew/go/install)"


I did the following, so you don't have to. If you tried to use the URL listed on many other guides, you'd see this:


CGMbPR:~ cgrant$ ruby -e "$(curl -fsSL https://raw.github.com/mxcl/homebrew/go)"
-e:6: syntax error, unexpected '<'
 ^
-e:7: syntax error, unexpected '<'
 ^
-e:9: syntax error, unexpected '<'
   
     ^
-e:10: syntax error, unexpected '<'
   
     ^
-e:10: syntax error, unexpected tIDENTIFIER, expecting end-of-input
   
                                              ^


3. Install wget (and git, maybe?)

Run this on the command line (no sudo required):

brew install wget

I had installed the full installer for Mac OSX for the native Github client prior to starting this install, which I believe installed the command line versions of git, so I didn't actually run the brew version. I also didn't change the path to make the /usr/local/bin versions come first in the search path. It doesn't seem to have caused any issues yet. So, I didn't install brew-managed git, but if you wanted to or hadn't installed git yet you should execute this:

brew install git


4. Install Ruby Version Manager (rvm) and ruby 2.1.0, apparently

Run this on the command line (no sudo required):

\curl -#L https://get.rvm.io | bash -s stable --autolibs=3 --ruby

This is what it looked like for me:


CGMbPR:~ cgrant$ \curl -#L https://get.rvm.io | bash -s stable --autolibs=3 --ruby
######################################################################## 100.0%
Downloading https://github.com/wayneeseguin/rvm/archive/stable.tar.gz

Installing RVM to /Users/cgrant/.rvm/
    Adding rvm PATH line to /Users/cgrant/.profile /Users/cgrant/.bashrc /Users/cgrant/.zshrc.
    Adding rvm loading line to /Users/cgrant/.bash_profile /Users/cgrant/.zlogin.
Installation of RVM in /Users/cgrant/.rvm/ is almost complete:

  * To start using RVM you need to run `source /Users/cgrant/.rvm/scripts/rvm`
    in all your open shell windows, in rare cases you need to reopen all shell windows.

# Chris Grant,
#
#   Thank you for using RVM!
#   We sincerely hope that RVM helps to make your life easier and more enjoyable!!!
#
# ~Wayne, Michal & team.

In case of problems: http://rvm.io/help and https://twitter.com/rvm_io

rvm 1.25.15 (stable) by Wayne E. Seguin , Michal Papis [https://rvm.io/]

Searching for binary rubies, this might take some time.
Found remote file https://rvm.io/binaries/osx/10.9/x86_64/ruby-2.1.0.tar.bz2
Checking requirements for osx.
Installing requirements for osx.
Updating system.
Installing required packages: autoconf, automake, libtool, pkg-config, libyaml, readline, libksba.....
Certificates in '/usr/local/etc/openssl/cert.pem' already are up to date.
Requirements installation successful.
ruby-2.1.0 - #configure
ruby-2.1.0 - #download
  % Total    % Received % Xferd  Average Speed   Time    Time     Time  Current
                                 Dload  Upload   Total   Spent    Left  Speed
100 9475k  100 9475k    0     0   661k      0  0:00:14  0:00:14 --:--:-- 1346k
ruby-2.1.0 - #validate archive
ruby-2.1.0 - #extract
ruby-2.1.0 - #validate binary
ruby-2.1.0 - #setup
ruby-2.1.0 - #making binaries executable.
ruby-2.1.0 - #downloading rubygems-2.2.1
  % Total    % Received % Xferd  Average Speed   Time    Time     Time  Current
                                 Dload  Upload   Total   Spent    Left  Speed
100  401k  100  401k    0     0   215k      0  0:00:01  0:00:01 --:--:--  215k
No checksum for downloaded archive, recording checksum in user configuration.
ruby-2.1.0 - #extracting rubygems-2.2.1.
ruby-2.1.0 - #removing old rubygems.
ruby-2.1.0 - #installing rubygems-2.2.1............
ruby-2.1.0 - #gemset created /Users/cgrant/.rvm/gems/ruby-2.1.0@global
ruby-2.1.0 - #importing gemset /Users/cgrant/.rvm/gemsets/global.gems.....
ruby-2.1.0 - #generating global wrappers.
ruby-2.1.0 - #gemset created /Users/cgrant/.rvm/gems/ruby-2.1.0
ruby-2.1.0 - #importing gemsetfile /Users/cgrant/.rvm/gemsets/default.gems evaluated to empty gem list
ruby-2.1.0 - #generating default wrappers.
Updating certificates in '/etc/openssl/cert.pem'.
mkdir: /etc/openssl: Permission denied
cgrant password required for 'mkdir -p /etc/openssl': 
Creating alias default for ruby-2.1.0.
Recording alias default for ruby-2.1.0.
Creating default links/files

  * To start using RVM you need to run `source /Users/cgrant/.rvm/scripts/rvm`
    in all your open shell windows, in rare cases you need to reopen all shell windows.


CGMbPR:~ cgrant$ source /Users/cgrant/.rvm/scripts/rvm


5. Install the rest of ruby

This first step took quite a while.
rvm requirements

Here's what it looked like for me:


The guide I was looking at suggested I run the following, which I did.


brew install autoconf automake libtool libyaml readline libksba openssl

Everything was installed already.


The next step was to run this command:

rvm install ruby-1.9.3-p392

I skipped this step because it looked like ruby-2.1.0 was installed earlier. (**Turns out ruby-1.9.3 is required for metasploit, although this isn't the most current version. I cover this later.**)

rvm gemset create msf


Other sites would have you run the following command, but looks like I have 2.1.0 installed so I modified it appropriately.

Unused:

rvm use ruby-1.9.3-p392@msf --default

Changed, used:
rvm use ruby-2.1.0@msf --default


Verify the install with the following command:
ruby -v


6. Installing metasploit

So, I did the following:

sudo su
cd /opt
git clone https://github.com/rapid7/metasploit-framework.git msf


CGMbPR:~ cgrant$ sudo su
sh-3.2# cd /opt
sh-3.2# git clone https://github.com/rapid7/metasploit-framework.git msf
Cloning into 'msf'...
remote: Reusing existing pack: 232980, done.
remote: Counting objects: 5, done.
remote: Compressing objects: 100% (5/5), done.
remote: Total 232985 (delta 0), reused 0 (delta 0)
Receiving objects: 100% (232985/232985), 198.63 MiB | 436.00 KiB/s, done.
Resolving deltas: 100% (163073/163073), done.
Checking connectivity... done

Checking out files: 100% (6515/6515), done.


7. "bundle install" - ruby gems

As I understand it, running bundle install installs the necessary ruby gems. This didn't work for me out of the gate.


This is the error you get when you don't have Postgresql installed first.

8) Install and Configure Postgresql

brew install postgresql --without-ossp-uuid


As it told me to do, I ran the link command to start postgresql on login:


ln -sfv /usr/local/opt/postgresql/*.plist ~/Library/LaunchAgents

I then fired up postgresql

launchctl load ~/Library/LaunchAgents/homebrew.mxcl.postgresql.plist

You then need to create a user for metasploit to use for the database:

createuser msf -P -h localhost

Then create a database called msf with msf as the owner

createdb -O msf msf -h localhost


9) Finish the ruby gems needed for metasploit to function

Then we need to finish with the gems metasploit needs to use.

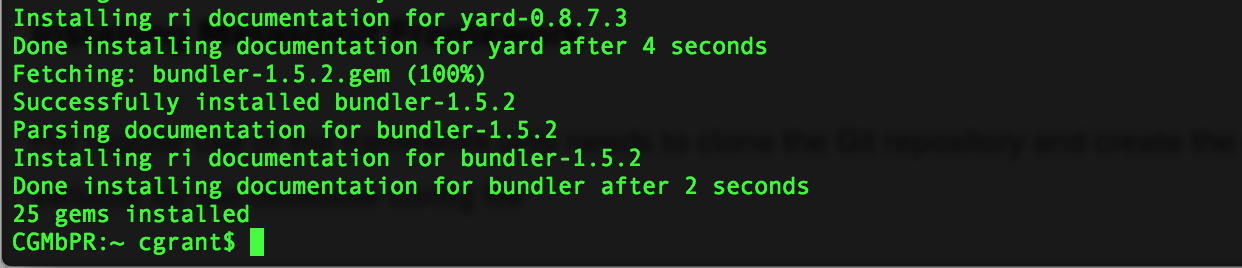
gem install pg sqlite3 msgpack activerecord redcarpet rspec simplecov yard bundler


A little while later...


10) Linking metasploit to Postgres


First edit the Postgres configuration file:

sudo vi /opt/msf/config/database.yml


Add the following to the file and save

production:
 adapter: postgresql
 database: msf
 username: msf
 password: 
 host: 127.0.0.1
 port: 5432
 pool: 75
 timeout: 5


11) making sure the shell environment is set up

source /etc/profile
source ~/.bash_profile

12) executing Metasploit, or so I thought

/opt/msf isnt' in my path so I'll execute it from the directory

I changed directories and it tells me ruby-1.9.3-p484 isn't installed


13) installing ruby-1.9.3-p484


Well, I'll see if I can take the shortcut route and just install ruby 1.9.3-p484 even though ruby-2.1.0 was installed earlier.

rvm install ruby-1.9.3-p484


14) execute msfconsole again...bundle install


Okay, so now one of the gems isn't installed.

Executing

bundle install


15) Okay, executing msfconsole again...and it worked!


It worked! I freaked out a little first, then I realized that this was by design. All good!

Just to make sure...execute msfconsole again:


SUCCESS!!!

Okay, maybe that was just a fluke:

Execute msfconsole again:


Looks like its working...